Low-code tools and Microsoft Power Automate solutions go in pairs. Digital process automation may help your company thrive and save time and money on repetitive tasks. Here’s how you can automate flows in your daily routine.
Teams overview: make the most of the Microsoft flow
In many organizations, Microsoft Teams has become an impactful application supporting teamwork on Microsoft 365. It is useful when working remotely, helping to integrate employees, content, and tools. In addition, it helps to create teams and manage workflows and projects, which translates into greater work productivity and commitment of team members in an organization.
In this article, we want to show you a use case illustrating how low-code tools can create automation in a company, using the example of the change approval process in the MS Teams application.
Importance of business process flows
Have you ever counted how many applications you use while performing your daily work duties or to manage repetitive tasks? We lost count a long time ago.
Their multitude is often troublesome. In some cases (often beyond our control), it may lead to errors and prolong the process of carrying out specific tasks and business processes. To prevent this, Microsoft has introduced the option of embedding existing services such as Power Apps, Power Automate, or Power Virtual Agents directly in Microsoft Teams channels.
This solution enables a power automate designer to create different types of flows from the specific service. The principles of creating cloud flows are almost the same as in the Power Automate Cloud. We can use immediate, planned, and automated flows and over 400 connectors, automating our daily tasks.
With the Teams Connector, we can trigger events using Teams data and automate tasks using Power Automate. We can design flows from scratch or use one of many ready-made templates.
Enough theory. Let’s see how a business process flow looks in practice.
Read more on low-code development:
Unleash your superpowers with new Power Platform AI capabilities
Is low-code development a panacea for the tech talent shortage in 2023
Hyperautomation—an emerging technology trend for 2023
How to build a customer service chatbot with Microsoft Power Virtual Agents
Low-code app development—a trend for 2022
Digital process automation with low-code platforms—5 typical use cases
AI Builder–artificial Intelligence for knowledge workers
Microsoft’s Power Virtual Agents: for highly capable chatbots
How you can streamline your business process with Power Automate
What is Microsoft Power Platform—an overview of the main features
Power automate flow in Microsoft products: case description
To show the possibilities of Teams digital process automation in cooperation with other Microsoft services, we will optimize the change request process in a sample project.
Our project team consists of several consultants, business representatives, and a project manager.
The project scope was described in the relevant documents and then entered into the backlog in the form of a list of tasks to perform in individual sprints. We used the planner app to manage the tasks, and stored documentation in the Microsoft One Drive service (separate folders).
The team communicates and collaborates using the Microsoft Teams application with a dedicated “PowerApps” team on the general channel:

Fig. 1 A general channel on the Microsoft Teams application
If there is a deviation from the established scope or a need to implement new functionality, the consultant creates a Word document to describe the purpose of the change, its range, and valuations, then emails the document to the project manager.
After analyzing the application and verifying the project budget, the manager accepts or rejects the change and emails a notification to the submitting person. Finally, the Manager places the Word document in either the Approved or the Rejected folder.
So far, this process has often caused disruptions in communication. Reporting persons did not always receive notifications about approved documents, as the project manager sometimes omitted such a request in a maze of other emails.
Other frequent mistakes included:
- placing documents in the wrong folders;
- sending a request for the same change approval more than once;
- Teams did not receive up-to-date information about changes.
To make the process as smooth as possible, the group decided to use Teams in cooperation with Power Automate and other services such as OneDrive and Planner.
Solution: Power Automate and Microsoft Teams
The very first step required installing the necessary software. At this point, we should add two components from the Teams apps store: Power Automate and Approval.
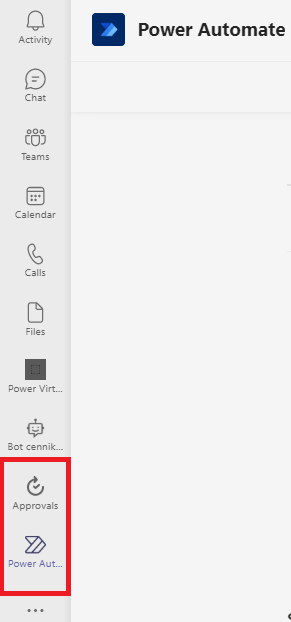
Fig. 2 Power Automate and Approval components
The Power Automate App automates Teams activities and connects to other apps and services available on the Power Platform. It helps to create, manage, and edit flows directly in the application. The approval app allows users to send, receive, manage, and share consent right in Teams.
After installing the application, open “Power Automate” to prepare a new flow:
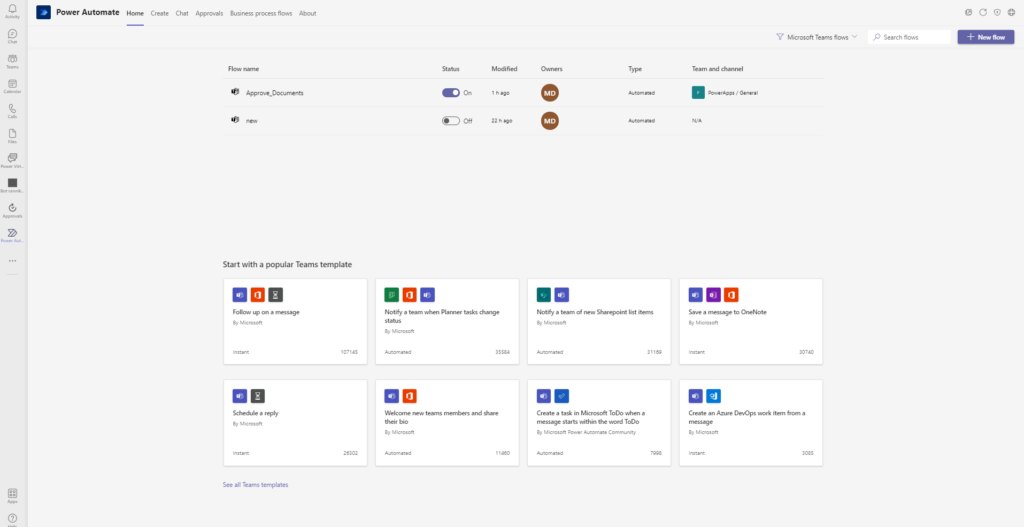
Fig. 3 Create a new flow in Power Automate
To configure the flow, select the “New Flow” button and define what action should be its trigger. When it comes to the Microsoft Teams connector, we have the following triggers:
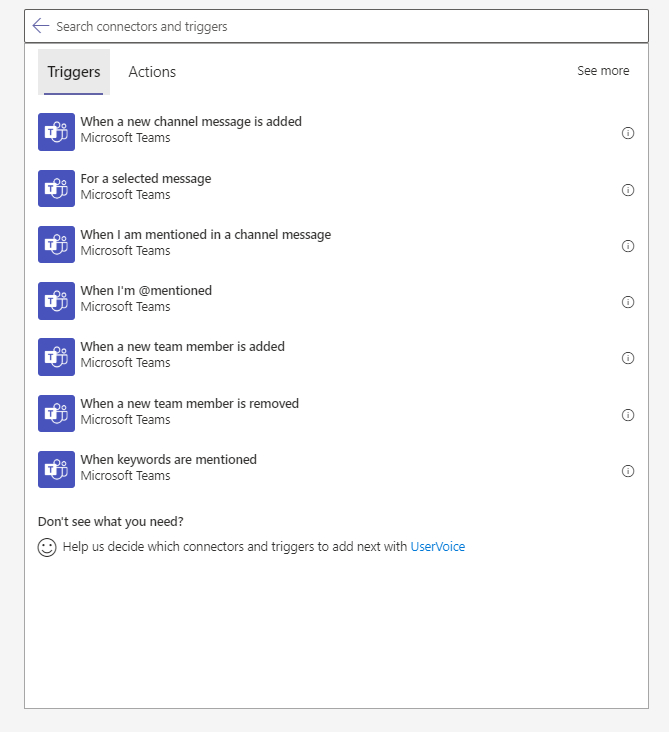
Fig. 4 Microsoft Teams triggers
In the next steps, we can add one of many actions for the connector:
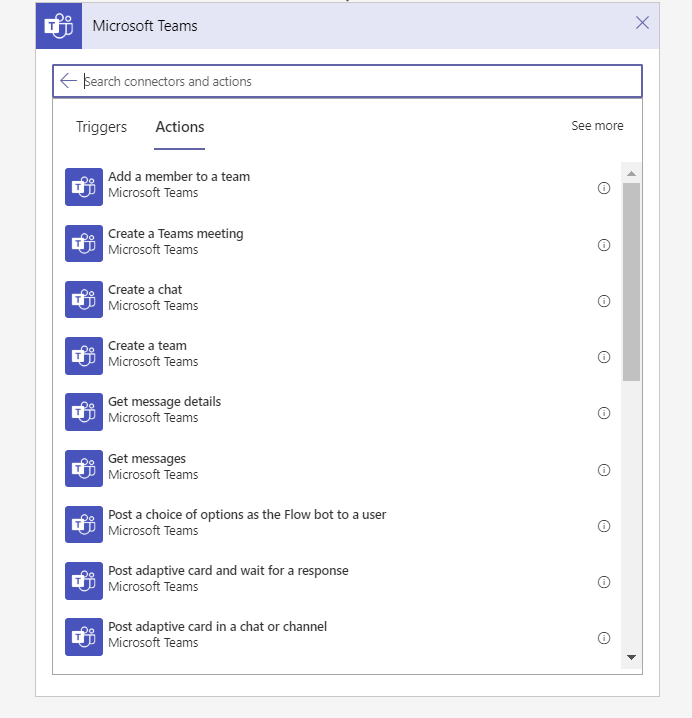
Fig. 5 Microsoft Teams connectors
In our case, the trigger for the flow will be to put the Word file on OneDrive in the “Documents” folder, so we select the “OneDrive” trigger:

Fig. 6 OneDrive trigger configuration
The ability to create Approvals is a great feature.
As part of the Power Automate service in Teams, we can use ready-made templates (e.g., placing a file on a SharePoint resource will initiate a decision-making process) or build different types of flows.
With this feature, we can reduce the time it takes to obtain document confirmations, improve control over their sharing, and organize them in specific folders.
We immediately have a decision-making application that works on computers, browsers, and mobile devices. In our case, we will use the action “Create approval”:
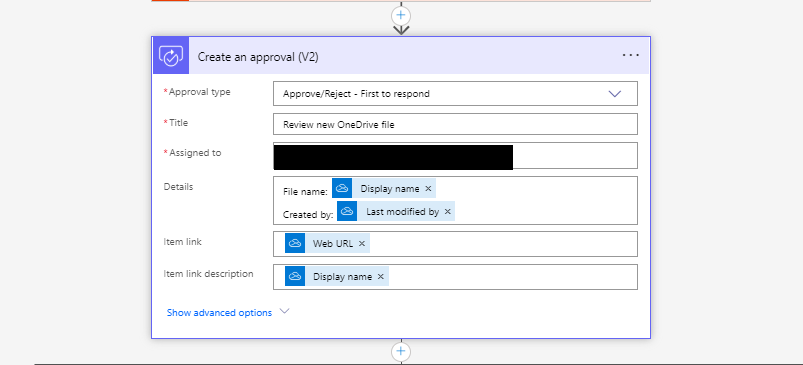
Fig. 7 Create an approval action—configuration
In the above window, we complete the appropriate parameters, such as:
- the type of a decision;
- who will be responsible for the approval or rejection;
- what content to include in the information for decision-makers.
We can build the content dynamically using elements from previous actions (use data about the file placed in the OneDrive service).
In the case of generating “Approval,” we want to inform the entire team on our channel about the CR request sent. For this purpose, we will use the action “Post adaptive card in a chat or channel” to indicate the appropriate parameters.
If it is not possible to generate such a request, we want to send an email message to the group administrator and complete the process. To do so, use the Office 365 action “Send an email” and the action “Terminate” from Power Automate:
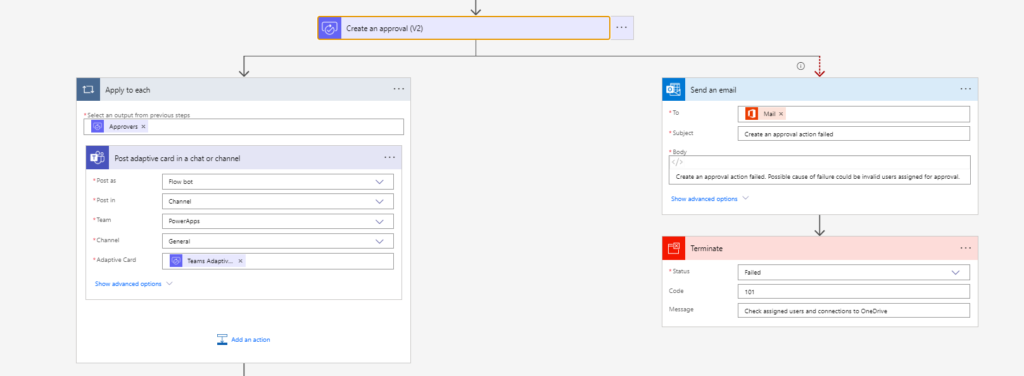
Fig. 8 Create an approval—validation
Now, we insert a condition depending on the result of the decision, thus branching our flow:
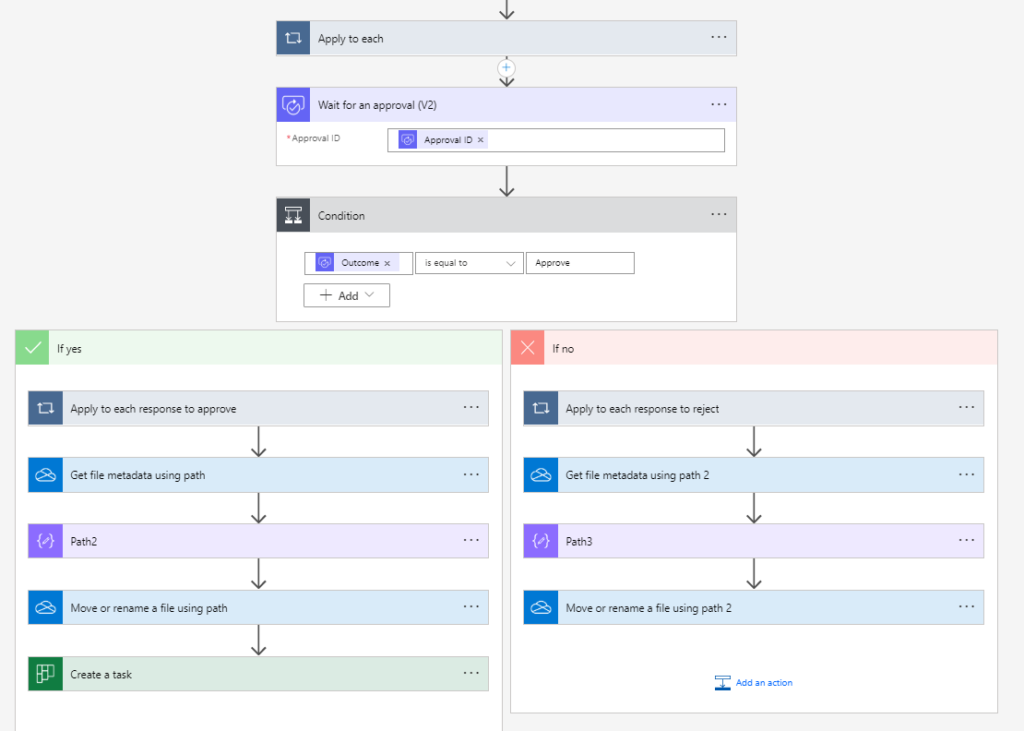
Fig. 9 A condition— checking approval results
If the decision is positive, the process has the following actions: inform users in Teams of the decision, then get the path to the file, move the file to the new “Approved” folder, and finally create a task in Planner:
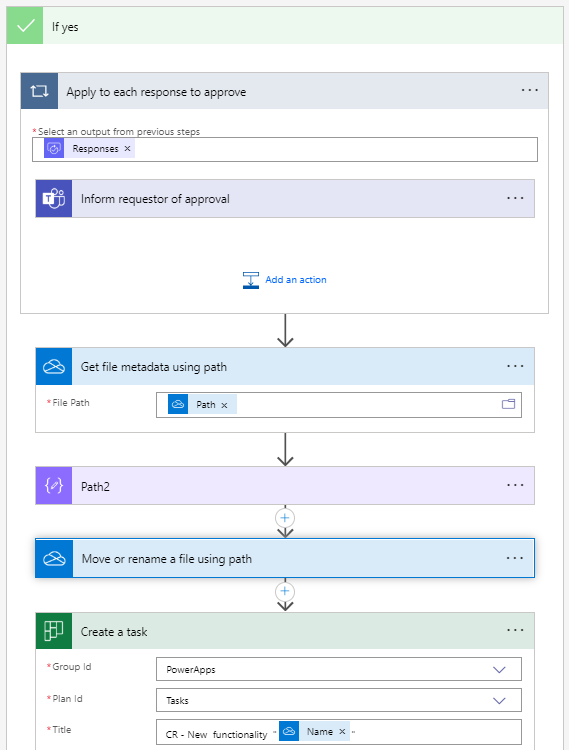
Fig. 10 Approval—a positive decision path
In the case of a negative decision, the steps are the same, but the system will move the file to the “Rejected” folder and will not start a task in Planner:
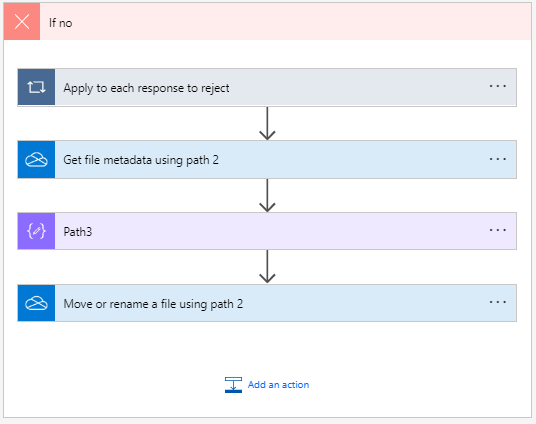
Fig. 11 Approval—a negative decision path
After configuring our system, let’s check how it behaves after placing the following file in the folder “Documents”:
“CR-04_Synchronize_customer_to_CRM.docx”

Fig. 12 A new file in the Documents folder
Because, in the configuration, I indicated myself as the acceptor of activities and the Approvals of the Microsoft Teams application, I received the following notification:
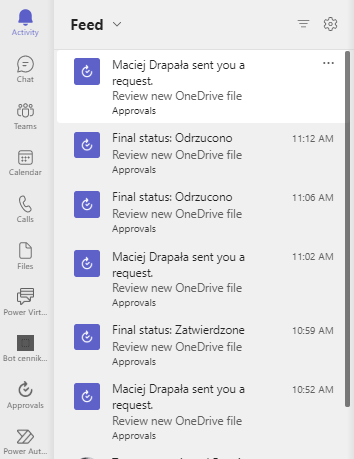
Fig. 13 Microsoft Teams—a notification request
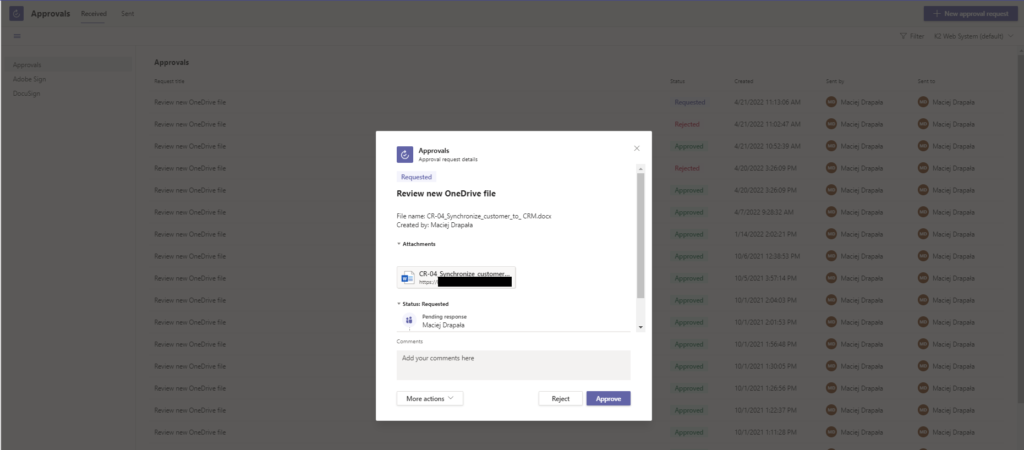
Fig. 14 Microsoft Teams—the details of the notification request
Such a notification also appeared in the chat in the “PowerApps” group, which I indicated in the course:
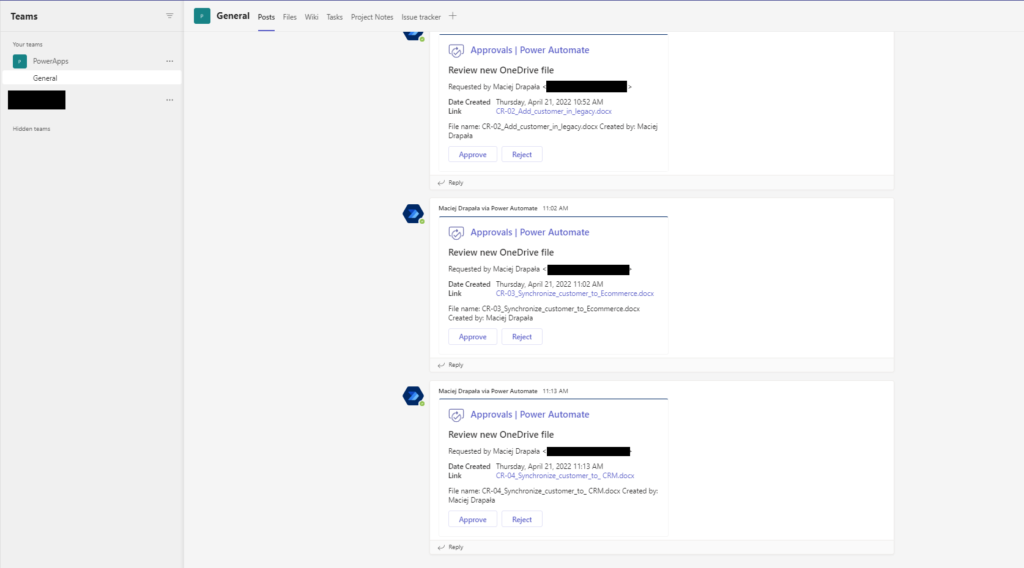
Fig. 15 Microsoft Teams—a channel notification request
And in the email box:
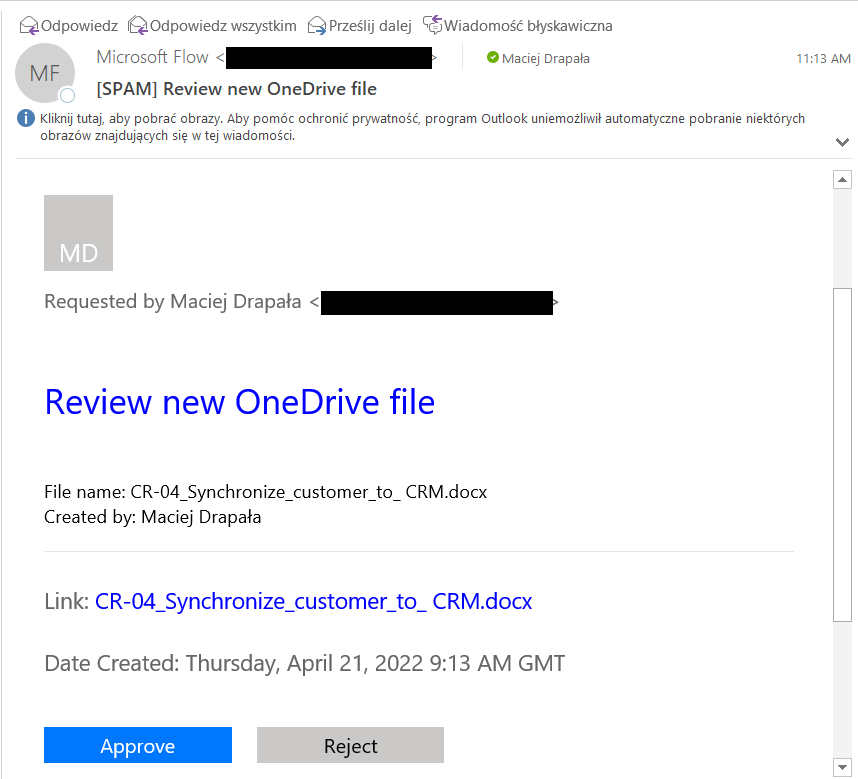
Fig. 16 An e-mail request notification
After confirming this document, notification about the change of status is sent to the selected team:

Fig. 17 A Team channel—a status change notification
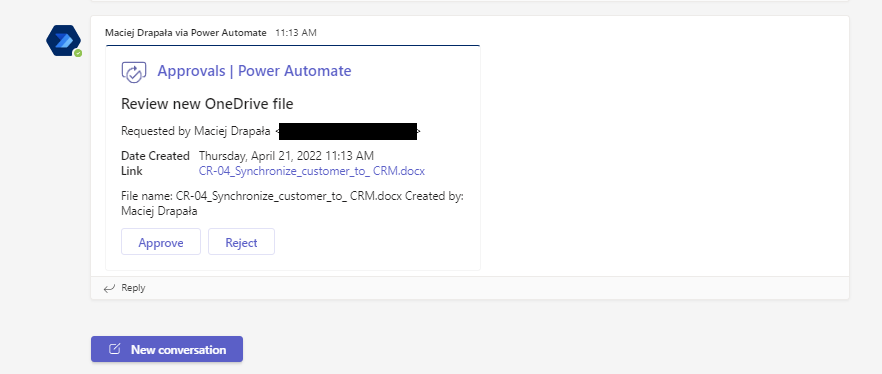
Fig. 18 A Team channel—the details of the status change notification
It is also visible in the “Approvals” application:
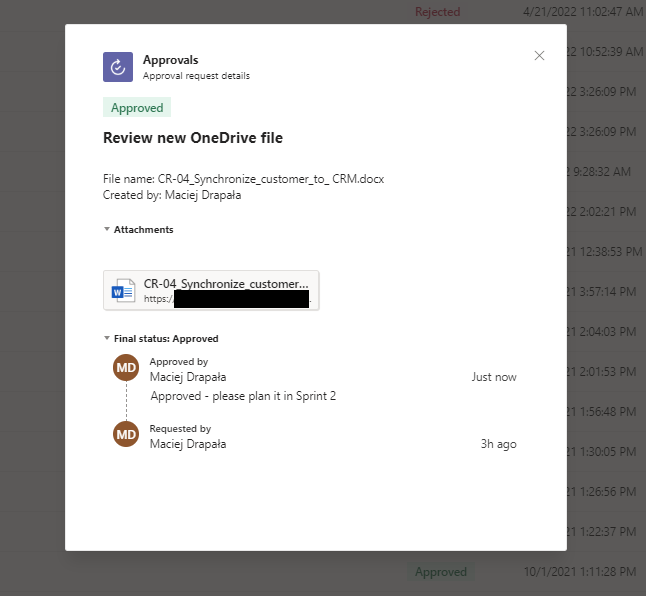
Fig. 19 Approvals component—a status change notification
The file “CR-04_Synchronize_customer_to_CRM.docx” has been moved to the folder “Approved”:

Fig. 20 A document in the Approved folder
Additionally, a task was created in the Planner app pinned to our project:
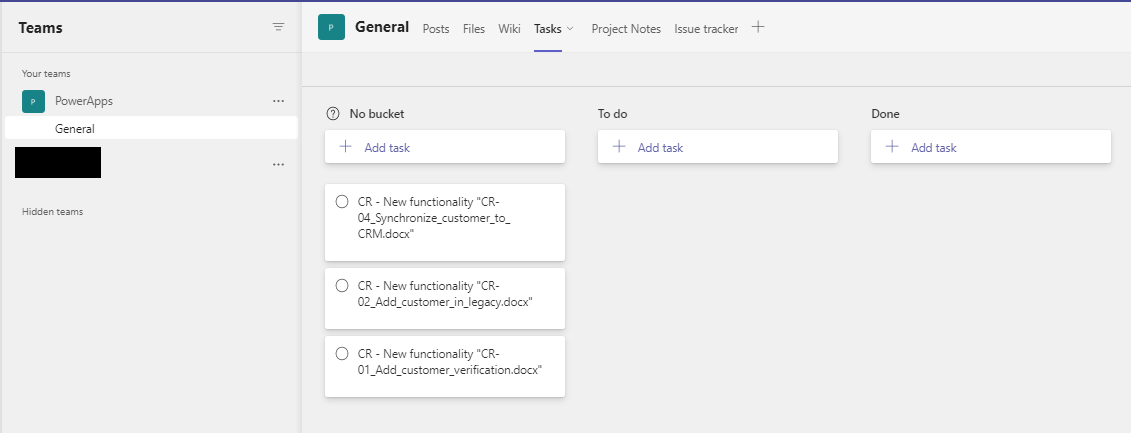
Fig. 21 A new task in the Planner component
The task and application related to the document “CR-03_Synchronize_customer_to_Ecommerce.docx” are missing in the above table and in the “Approved” folder because this application was previously rejected:
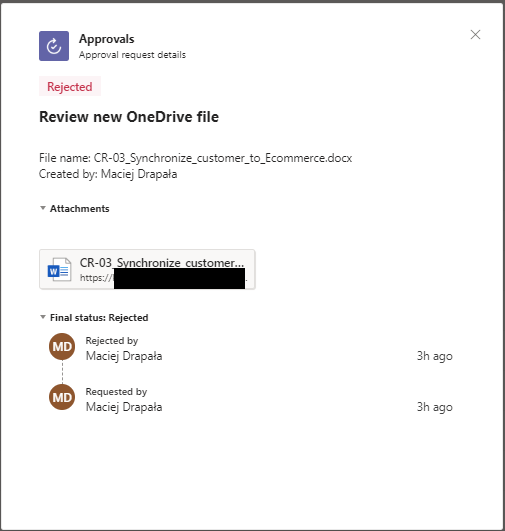
Fig. 22 A rejected CR request
According to our configuration, it went to the “Rejected” folder and the task is not created in Planner:

Fig. 23 A document in the Rejected folder
Automated flow step by step:
- The new file goes to the “Documents” folder.
- Approval request to the decision-maker.
- A message is sent to Teams (and email) about the document for approval.
- If the person accepts, the document is moved to the “Approved” folder.
- If the person declines, it goes to the “Rejected” folder.
- Information about the decision is sent to people involved in the process.
- In the case of a positive decision, the task is created in the Planner.
Power automate flow—wrap-up
The example demonstrated in this case study is not complicated, but it shows the power and possibilities offered by connecting Teams with Power Platform and other systems from the Microsoft family.
Creating such a simple flow can help us automate many activities previously performed “manually” and organize processes related to, for example, maintaining project documentation.
Since all of the mentioned Microsoft apps overlap, we can configure them intuitively and use built-in services in Planner, or Approvals applications, to improve communication in the project. To get the most from Microsoft Power Automate solutions, we can use all these possibilities on any browser, desktop, or mobile device (desktop flows, cloud flow, and more).
From a broader perspective, Microsoft Power automate can help companies to embrace digital process automation that is a first step towards hyperautomation in handling day-to-day operations.


